The scenic drive Ryfylke is one of the routes we enjoyed the most during our time in Norway. Not only because of its views along the way, but mainly because that road took us to some of the most spectacular hikes we’ve ever done! In this blogpost, we give you an overview of the hikes we liked the most in the Ryfylke region and give you some tips and advice regarding hiking in Norway in general.
Some of the links on this blog are affiliate links. This means if you click on a link and purchase, we receive a small commission at no additional cost to you. The affiliate links concern only products and services we appreciated highly and trust. This means the views and opinions expressed in this post are purely our own. For more information, read our privacy and cookie policy.
Table of Contents
The number one hike of Norway – Preikestolen
Summary of the hike
- Relatively easy
- 8 kilometers back and forth
- Takes about 4 hours
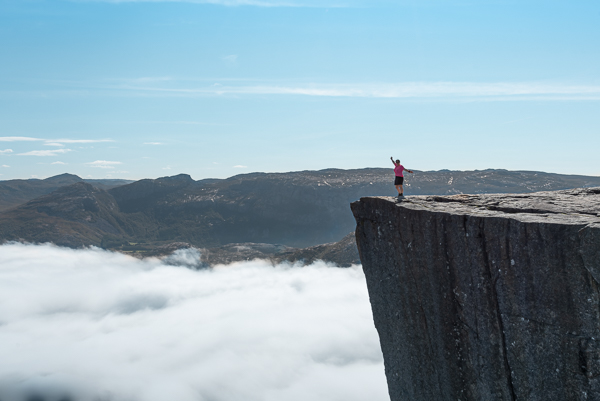
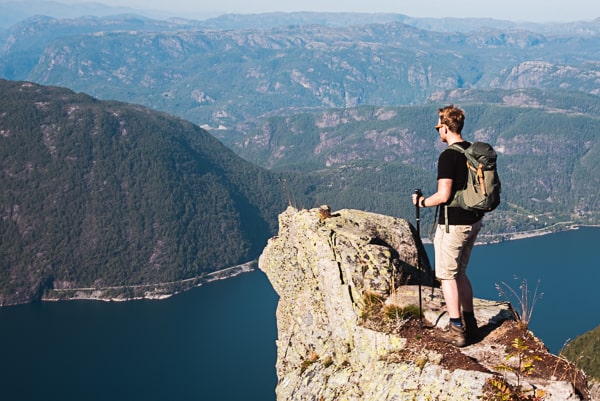
Preikestolen (Pulpit Rock) is a protruding rock with a flat surface that has steep walls on three sides. As it is situated 604 meters above the famous Lysefjord, it offers splendid views. Keep in mind that the hike to Pulpit Rock is the most famous hike of Norway, so don’t expect to have the rock to yourself. During high season, you have to queue to take a picture with the Lysefjord in the back. And its popularity has led to the construction of a huge parking lot where you have to park your car for 250 Norwegian Krones. However, Preikestolen is an iconic hike and we suggest to defy the crowds and enjoy this gorgeous place.
The hike starts at Preikestolen Fjellstue (coordinates 58°59’30.9″N 6°08’17.0″E), takes about 4 hours (back and forth) and includes a 500 meters elevation gain. The trail to the Pulpit Rock is marked with the famous red T and along the path there are distance markers telling you the distance to Pulpit Rock and the parking lot. So getting lost is extremely difficult. There are some steep parts but overall the hike is considered as relatively easy and along the way Nepalese Sherpas have carefully made stairs of rocks.
Preikestolen during sunrise
As the trail is really well signposted, it is possible to start really early (in the dark) and arrive at Pulpit rock at sunrise. There are tours that offer this sunrise hike so we’re not sure if this will help you to beat the crowds, but we can imagine that witnessing sunrise from this iconic rock is an amazing experience!
Another option is to camp near Preikestolen. Wild camping in Norway is allowed, so bring you tent and sleeping bag and catch both sunset and sunrise. Camping is not allowed on the rock itself, but nearby are some splendid places to set up camp! Adventure guaranteed!
Vanlife in Norway – Where to stay when hiking Pulpit Rock
Because there is an (expensive) parking lot at the start of the Preikestolen hike, parking and overnight camping is not allowed in the area. They make this very clear with many prohibition signs. There are however different campsites in the area. If you are looking for a free place to spend the night in you camper, we suggest the parking spot on the Ryfylkevegen in Jørpeland with these coordinates: N 59°0’19.4472” E 6°4’13.368”. It is not exactly the most charming spot to spend the night (next to the road) but it is a good starting point in the morning for the drive to the parking lot at Preikestolen Fjellstue. And bonus, there are different amenities like a toilet, drinking water and a place to dump your waste water. Come early, as probably a lot of other hikers might want to spend the night here.
A historical hike along Ryfylke – Ritlandskrateret
Summary of the hike
- Relatively easy
- 6 kilometers back and forth
- Takes about 2,5 hours
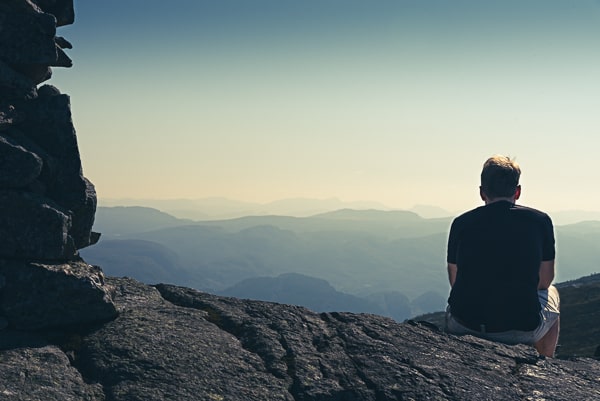
This hike is a circular route so only at the start and the end you hike the same path. This hike takes you to a viewpoint where you look over the impact crater that was the consequence of a meteorite hitting earth 500 million years ago.
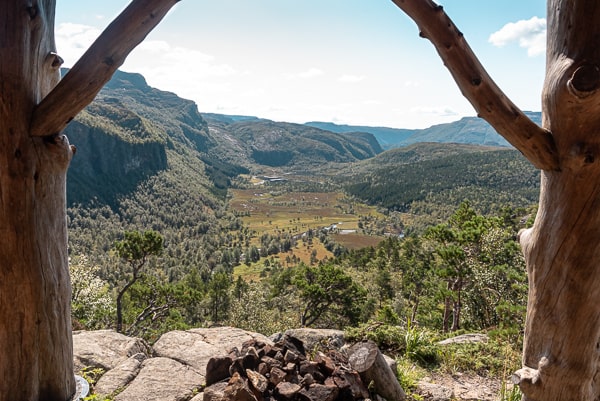
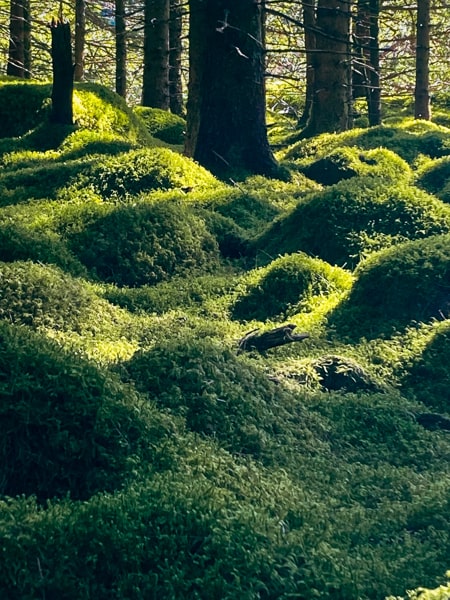
At the viewpoint, there is a shelter (“gapahuk”) where you can find more information about the meteorite and the crater. To start this hike, drive to Kleivaland and continue to drive until you reach the parking spot where the hike starts (“Slope Land Parking”, coordinates: 59°14’09.5″N 6°23’05.7″E). The trail is well-marked. Just follow the signs “Utsikt Ritlandskrateret”. When you’re heading back from the shelter to the parking lot, follow the signs to Kleivaland. This trail will take you down to the crater and through one of the most magical forests we’ve ever seen!
Vanlife in Norway – Where to stay when hiking the Ritlands crater
The parking spot where the hike starts is free and is surrounded by fields, so it makes the perfect place for spending the night. However, note that there are no facilities, so bring you own food, water and toilet.
A hike for those that are not faint hearted – Skomakarnibba
Summary of the hike
- Challenging
- 5,7 kilometers back and forth
- Takes about 6 hours
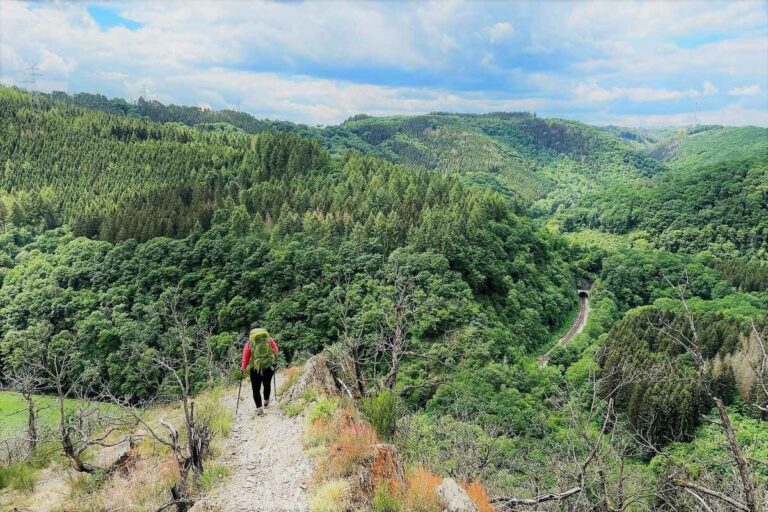
Skomakarnibba is also a protruding rock 700 meters above sea level and standing on the rock looking down can give you a sense of dizziness. Definitely not for the faint hearted! The hike starts at the Hagalid farm where there is a parking lot (coordinates: 59°15’13.0″N 6°12’21.7″E) and different signposts. At first, there is an enjoyable forest trail, but at a certain point the trail becomes less noticeable and requires some clambering on rocks. Once you reached the top, the trail heads back via the same route back to the parking lot.
The hike with the best views – Reinaknuten
Summary of the hike
- Moderate to difficult
- 11 kilometers back and forth
- Takes about 5 hours
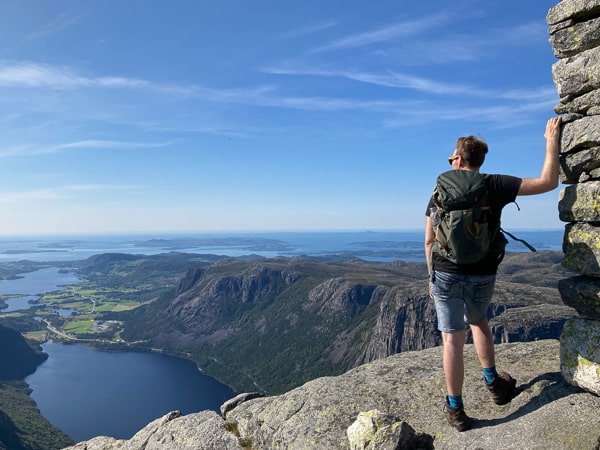
This is the hike we liked the most, as the views were splendid. Note that the hike is sometimes written as Reinaknuten and sometimes as Reinarknuten. From the top, you have an overview of the entire area. To start the hike, drive to the parking lot that is named “Parkering Reinarknuten” (coordinates: 59°03’46.9″N 6°03’57.8″E). From here, there are signs that guide you to the top. The hike starts relatively easy, until you reach some small lakes. From here on, the trail gets steeper until you reach another lake. The final climb to the top of Reinaknuten is definitely the steepest part, but at the top, you are rewarded with an amazing view. There is water everywhere, you can see the Tysdalsvatnet lake, the fjords and even the ocean. As this is a less known hike, you probably are alone to experience the views.
Vanlife in Norway – Where to stay when hiking Reinaknuten
The parking spot where the hike starts has a splendid view and is deserted in the evening. A perfect place to have a chill night.
A hike for the fearless – Kjeragbolten
Summary of the hike
- Difficult
- 11 kilometers back and forth
- Takes about 6-8 hours
Kjeragbolten, a hike for the fearless. Standing on a tiny rock with 984 meters of empty space underneath is probably a once in a lifetime experience (let’s hope not literally) but keep in mind that this hike is strenuous and very popular.
The hike starts at the parking lot Øygardsstøl (parking fee is 300 NOK, coordinates: 59°02’48.4″N 6°39’08.2″E) and the trail is well-marked with the famous “T” sign. The first part is steep, you have to pull yourself up using chains. In total, you have to conquer 4 mountains before you reach the famous stone that is wedged between two mountains.
General advice about hiking in Norway
Sturdy footwear is a must-have
Some trails go through swampy terrain so make sure you’re footwear protects you from getting soaked feet. Also, the Norwegian landscape includes rocks, plenty of rocks. So sturdy footwear is a necessity to prevent sore feet. Also make sure that your clothes are the proper gear for hiking. Read: function over fashion! We recommend to take trekking poles with you. These are helpfull both for the way up as the way down!
Take plenty of food and water with you
There aren’t restaurants or shops on the trails, so make sure you take the calories that you need with you. Our favorites are peanut butter and banana sandwiches, cheese and a trail mix or nuts. Also, the weather can change rapidly, so make sure you have plenty of water when temperatures rise. When we hikes in Norway, we were happy to have a CamelBak with us.
Get advice on the weather
Make sure you get information on the weather beforehand. If the weather gets rough, postpone your hike till the weather gets better.
Choose a hike according to your level of fitness
Choose hikes that are appropriate for your level of fitness. Always look up the length and difficulty of the hike so you are sure that you start the hike on time.
Let someone know about your hike
Tell someone the exact location where you’re going, when you plan to be back and when they should call for help.
Follow the trail etiquette
The nature in Norway is stunning, and we should treat it with respect. So practice the Leave No Trace principles on your hike.
We hope this blog gave you some inspiration for hiking in Norway! Do not hesitate to leave a comment below!
Looking for more information on hiking and camping?
Check out our independent hiking and camping guide!
Happy hiking!
Matthias and Mieke
Quick start your holiday with the help of our trusted tools
These are the websites we highly recommend to plan your next trip. We use them all the time to save money and travel freely! Did you know that by purchasing through our links, you support us at no additional cost. Thank you for your support. ♥️
Find hotels: via booking.com
Find a rental car: via discovercars.com
Find cheap flights: via skyscanner.com
Book tours & attractions: via getyourguide.com
Book a bus / train / transfer: via omio.com—